AI ASSISTANTS & MCP
Connect Transformify to AI assistants and MCP clients
Send messages, manage campaigns, retrieve reports, and automate messaging workflows directly from Claude, ChatGPT, Cursor, and other MCP-compatible tools.
Authenticate using your Transformify account — no API keys to copy or manage.
Paste this URL into your AI assistant. You will sign in with your Transformify account when the assistant connects — no API key to copy.
You approve permissions on first connect.
The assistant only receives access you explicitly allow.
- Connect to the MCP server
- Required — opens an MCP session as you.
- Send messages
- Send Viber and SMS messages.
- View campaigns
- Read campaign delivery and statuses.
- Manage campaigns
- Create, start, pause, and manage campaigns.
- View approved senders
- Access approved Viber brands and SMS senders.
- View reports
- Read campaign performance and delivery reporting.
Pick your assistant, connect in 2 minutes
Select an assistant below. The setup flow updates instantly — paste the MCP URL, sign in once, and Transformify tools become available.
Connect directly from claude.ai using custom connectors.
Connect using Anthropic's desktop app for macOS and Windows.
Connect Transformify inside your ChatGPT workspace.
Other MCP-compatible clients (Cursor, Continue, Zed, custom): point them at https://api.transformify.mk/mcp and authenticate with your Transformify account.
Open Claude Settings → Connectors
In claude.ai, open Settings and choose Connectors. This is where Claude lists every external tool surface.
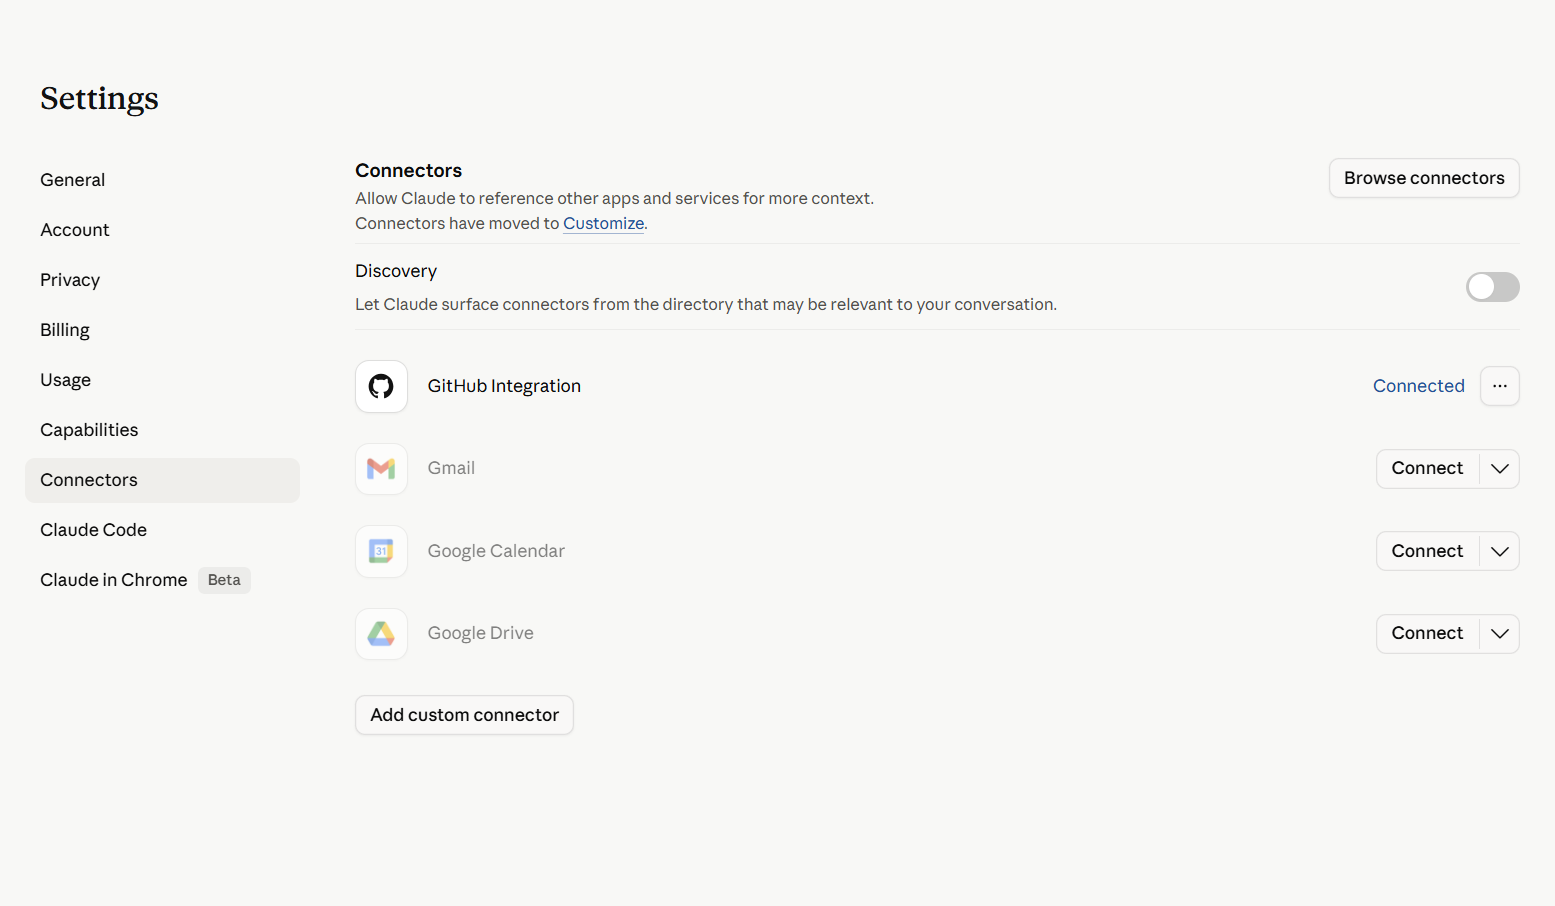
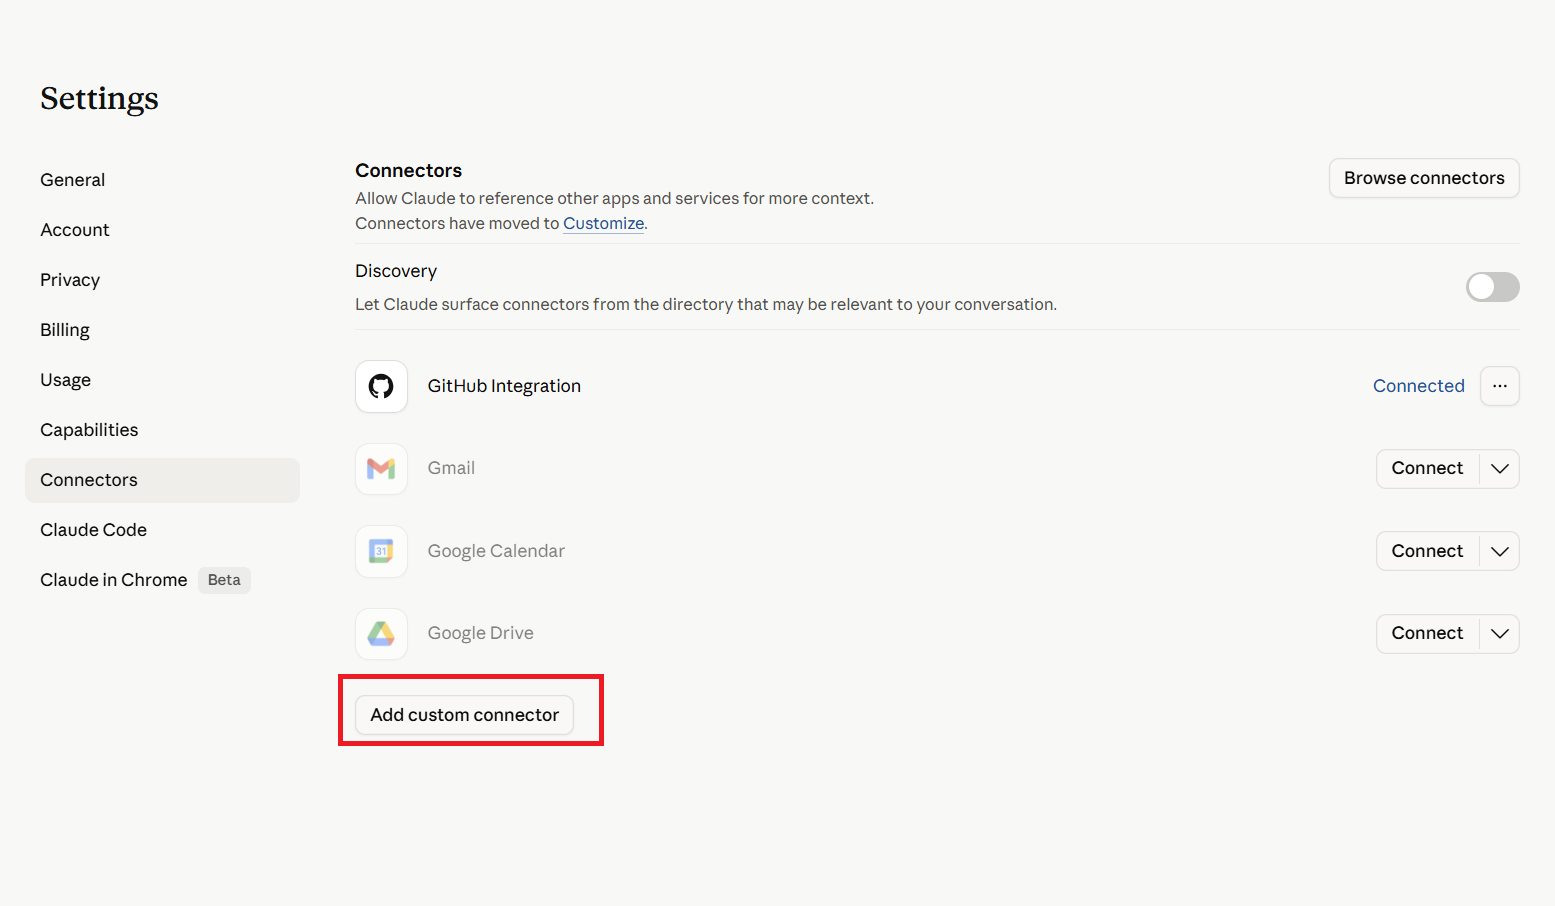
Click “Add custom connector”
At the bottom of the Connectors list, click Add custom connector. A modal asks for a name and a server URL.
Paste the Transformify MCP URL
Name it Transformify, paste the URL into the Server URL field, then click Add.
Connect, sign in, and approve permissions
Transformify now appears in the Connectors list. Click Connect, sign in, and click Allow on the consent screen.
Enable Transformify in a chat
Open a new chat, click the tools / connectors icon, and toggle Transformify on.
Try these prompts in Claude.ai
Copy a prompt below to test your Transformify connection and available tools.
send_sms_messagesend_viber_message, list_viber_serviceslist_campaigns, get_campaign_statuslist_campaigns, get_campaign_statusquery_survey_responseslist_message_templatesOpen Settings → Connectors
In Claude Desktop, open Settings (⌘ , on macOS, Ctrl , on Windows) and choose Connectors.
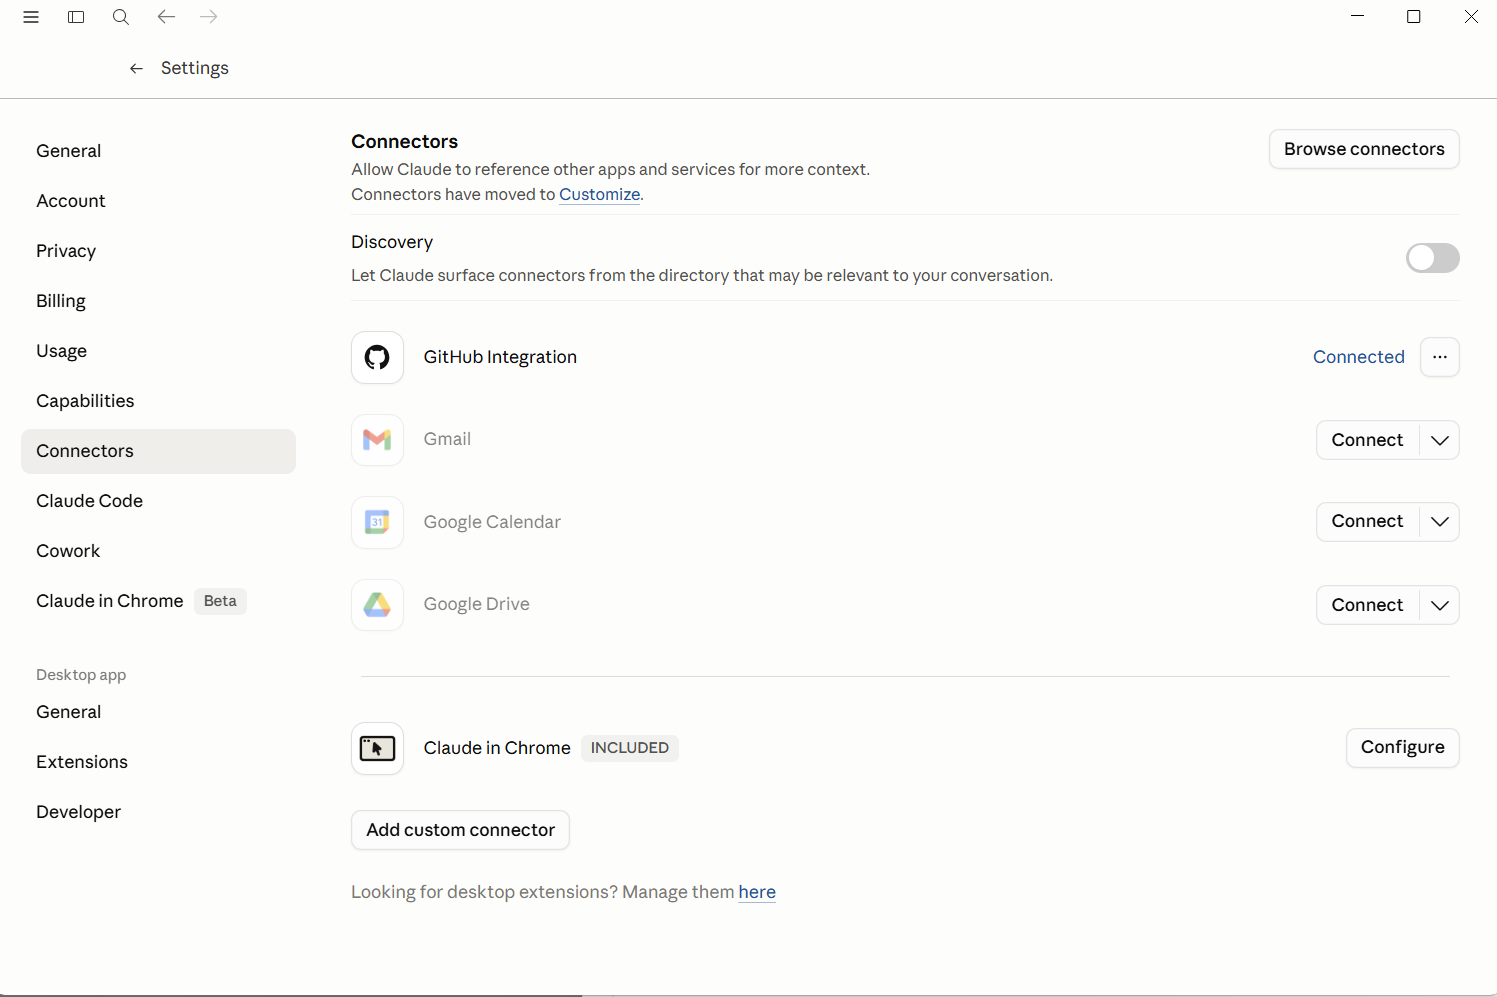
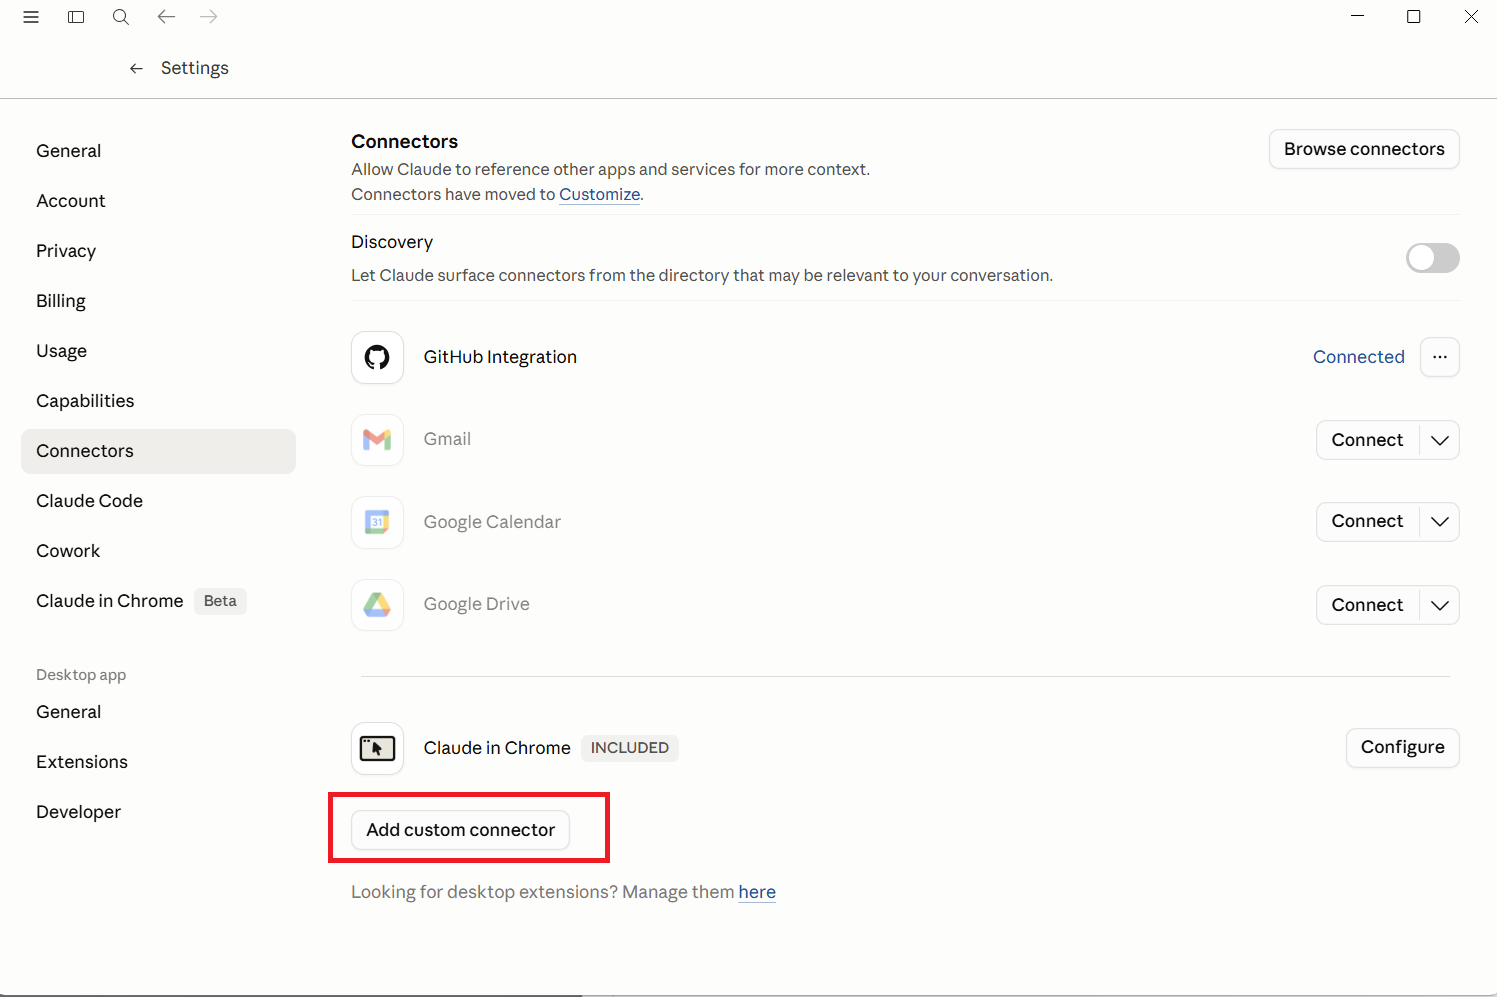
Click “Add custom connector”
Scroll to the Developer row and click Add custom connector. A dialog asks for a name and a remote MCP server URL.
Paste the Transformify MCP URL
Name it Transformify, paste the URL into the MCP server URL field, then click Add. Leave Advanced settings empty.
Connect, sign in, and approve permissions
Click Connect next to Transformify — Claude opens your browser to the Transformify sign-in page. Log in, then click Allow on the consent screen. The window closes automatically.
Verify the tools are available
Open a new chat, click the tools / connectors icon, and toggle Transformify on. You should see the Transformify tool set.
send_sms_message
send_viber_message
list_campaigns
get_campaign_status
start_campaign
list_viber_services
list_sms_senders
list_message_templates
create_sms_template
query_survey_responses
claude_desktop_config.json (Settings → Developer → Edit Config) with { "mcpServers": { "transformify": { "url": "https://api.transformify.mk/mcp" } } }, then restart. The UI flow above is recommended.
Try these prompts in Claude Desktop
Copy a prompt below to test your Transformify connection and available tools.
send_sms_messagelist_campaignsget_campaign_status, list_messageslist_messages, list_campaigns, get_campaign_statuscreate_sms_templatelist_viber_servicesOpen the workspace Connectors page
In ChatGPT, open Settings → Workspace → Connectors.
Click “Create custom connector”
Choose Create custom connector and select MCP as the type. ChatGPT asks for a name, an optional logo, and an MCP server URL.
Paste the Transformify MCP URL
Name it Transformify, paste the URL into the MCP server URL field, then save. Members can now enable it.
Members connect, sign in, and approve permissions
Each member clicks Connect on the connector tile and signs in with their Transformify account. Each member uses their own identity, so actions are logged per user.
Enable Transformify in a chat
In a new conversation, click the tools / connectors icon and toggle Transformify on.
Try these prompts in ChatGPT
Copy a prompt below to test your Transformify connection and available tools.
send_sms_messagesend_viber_message, list_viber_servicesstart_campaign, get_campaign_statuslist_campaigns, get_campaign_statusquery_survey_responsescreate_sms_templateConnect your AI assistants to real messaging operations
Give Claude, ChatGPT, and MCP-compatible clients secure access to campaigns, messaging, reporting, templates, and operational workflows — through Transformify's unified messaging platform.
OAuth-secured · Audit logged · MCP compatible · Built for production workflows